Category: Stuart 10v


From the bottom up !

Boxbed

First steps – clean the boxbed up with a Dremel and a file to get rid of any casting flash.

Boxbed in 4-Jaw

Mount in the 4-jaw. I’m using brass sheet to protect the casting.  Doesn’t have to be super concentric, as long as it’s fairly well balanced.

Facing off boxbed

Facing off – I’m using a tipped tool here and 320 RPM.  Seems alright to me !  I cut .20mm at a time, with a .10mm finishing cut.

Once faced, flip over in the chuck, ensure it’s seated nicely, and face the top.

Quick check with the height gauge.
Soleplate and standard part 1

More filework in the vice – I used needle files to get everything looking good before machining.

Same for the standard – I cleaned off the lumps, presumably where the metal was poured into the mould.

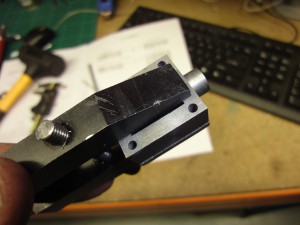
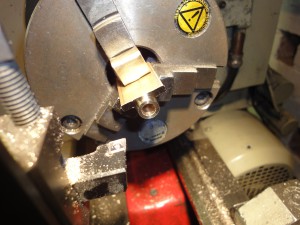
Fairly odd setup for the machining the feet.  I was half expecting bits of casting to fly around the workshop, but it seemed to be rigid enough to machine.  I popped a washer over the point of the centre in the tailstock to stop it digging too far into the dowel.
Just a closer look at the setup after a couple of passes.

Just a closer look at the setup after a couple of passes.

Soleplate and standard part 2

With the feet machined flat some modified clamps were used to hold the standard on the faceplate.

Clocking the outside edge of the standard – bit fiddly with lots of re-mounting of the faceplate.

Turning and facing the top of the standard is pretty straightforward – Lots of light cuts meant boring took a while.

Standard facing and boring completed – quite a nice finish.

Progress so far…

Steam Cylinder

Cylinder faced and being bored out to 19mm.

I did think about lapping the bore – maybe before I make the piston.

Setup for machining the port face of the cylinder – brass covers for the jaws to stop bruising of the machined faces.

Progress so far…

Making a spot facer

An attempt at making a spot facer – 6mm silver steel drilled to suit the 3mm spigot, slotted and filed then hardened and tempered. Needs more relief on the cutting faces, but works ok.

Bottom Cover

Starting to reduce diameter for the bottom cover. The notes I have imply that the supplied stock is 35mm ground cast iron – the material I have isn’t ground so needs a bit of tidying up.

Different view of the same job.

Using the Warco digital scale to cut the shoulder down to the correct depth.

Once the spigot had been drilled and a 5/16th thread cut the parting tool came out.

Then the part was reversed, mounted in the 3-Jaw and the spigot / rebate (?) cut to ensure a nice fit in the cylinder.  I’ve reamed the hole out to 4mm to use 4mm silver steel as I don’t have a 5/32” reamer.

Covers and Valve Chest Part 1

Top and bottom cylinder covers completed. Fairly simple with a bit of cut-and-try to get a nice fit in the cylinder. I used the parting tool to make the top cover in one operation.

Assembly so far.  I’ve also drilled, tapped and installed the studs to hold the soleplate to the boxbed.

Initial setup of the valve chest in the 4-jaw, using parallels to hold work clear of the jaws.

Top and bottom facing done, remounted with soft jaws to clean up the sides of the casting.

Turning completed – part now marked out in preparation for drilling clearance holes for mounting bolts.  In doing so I noticed one centre pop needed ‘drawing’ over slightly, so one more tap and……

Disaster.  Off to the Stuart Models website to order a spare !

Why does this always happen when you’ve done all the machining…. ?

Covers and Valve Chest Part 2

Second time lucky ! I’ve tidied up the valve chest cover casting with some micromesh – although I expect I’ll paint it eventually.

Progress so far…

Stuart 10v Catchup

A hiatus caused by the mill arriving has meant no 10v updates for a while – here a catchup of the little bits I’ve been doing.

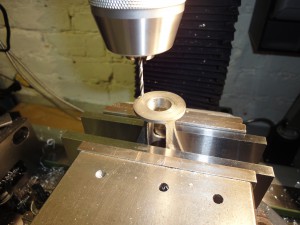
Drilled mounting holes for valve chest cover by spotting through from holes in the valve chest:

Obviously, I HAD to use the mill to drill the final holes in the soleplate.  Touched off all the sides to find a zero point, then a quick bit of drilling in the relevant co-ordinates.  Lovely !

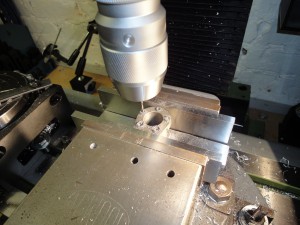
Used the PCD function of the mill to help drill the mounting holes in the standard:

Using the PCD function again to drill the stud mounting holes in the cylinder.

Back to the lathe !  Turning the crank bearing out of the supplied brass section – don’t worry – the part is square – it’s the brass jaw protector that’s making it look cocked !

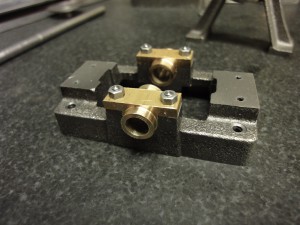
And we have a bearing !  Took a bit of gentle fitting with a file – but ended up with a pleasingly nice snug fit – needs a bit of a tidy up in the bore.

Stuart 10v Bearings installed

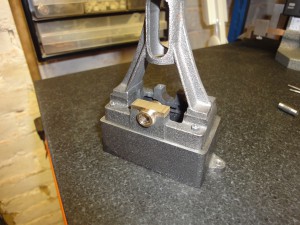
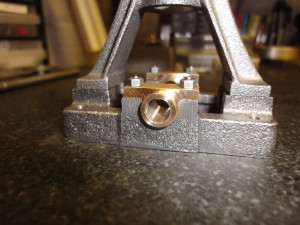
Crankshaft bearings installed.  Need an oiling hole drilled  in the centre . Fairly well aligned too !